From Mood Board to Bag Tech Pack: A Designer Workflow
How long does it take to turn a mood board into a bag tech pack that a production partner can cut from? Six to ten working days across four phases: concept inventory, measurement translation, material and hardware specification, then construction and packaging notes. The file that comes out the other end carries roughly 120 discrete entries, of which twelve are measurements — and those twelve are the only ones that decide whether the first prototype is close or a guess. Two days spent on the mood board saving three days on the measurement phase is the best trade in the whole workflow, because every number not written down becomes a round later.
- Six to Ten Working Days, Broken Into Four Phases
- Phase One: Turning Images Into an Inventory
- Phase Two: Translating Proportion Into Measurements
- Phase Three: Specifying Materials and Hardware
- Phase Four: Construction Notes and Packaging
- The Twelve Measurements Every Bag Tech Pack Needs
- Where Designers Lose Days: Four Common Delays
- What the Finished File Looks Like
- Units, Rounding and the Tolerance Stack
- Build a Reference Library Before the First Line
- Version Control That Ends the Email Thread
- The Pre-Flight Check Before the File Leaves
How long does it take to turn a mood board into a bag tech pack that a production partner can cut from? Six to ten working days across four phases: concept inventory, measurement translation, material and hardware specification, then construction and packaging notes. The file that comes out the other end carries roughly 120 discrete entries, of which twelve are measurements — and those twelve are the only ones that decide whether the first prototype is close or a guess. Two days spent on the mood board saving three days on the measurement phase is the best trade in the whole workflow, because every number not written down becomes a round later.
The workflow in numbers
Six to Ten Working Days, Broken Into Four Phases
Designers routinely underestimate the tech pack because they count the drawing and forget the decisions. A mood board contains images; a tech pack contains numbers. The conversion between the two is where the time goes, and it is also where a season is won or lost. The four phases below are the honest split, and the days attached to each are working days of focused effort rather than elapsed calendar time.
| Phase | Days | Input | Output |
|---|---|---|---|
| One, inventory | 1-2 | Mood board, reference images | A component list and three silhouette decisions |
| Two, measurement | 2-3 | Proportion, reference bag | Twelve measurements in millimetres with tolerances |
| Three, specification | 2-3 | Material direction, colour intent | Material, hardware and colour references |
| Four, construction | 1-2 | Everything above | Construction notes, packaging and branding spec |
The phases are sequential but not blocking. Phase three can start on day two, because material sourcing runs independently of measurement work, and running them in parallel is how a confident designer gets to six days rather than ten. What cannot be parallelised is phase two: measurements have to be resolved before any pattern is drawn, and a measurement guessed at becomes a revision later. The sampling and approval process downstream is built on the same assumption.
Phase One: Turning Images Into an Inventory
A mood board is a set of attractions, and none of them is a specification. Phase one converts each attraction into one of three things: a silhouette decision, a component decision or a finish decision. Anything that cannot be classified is an inspiration note and should be left out of the file, because it will otherwise resurface as a late revision.
- List every component visible. Body, gusset, base, flap, strap, closure, lining, pockets, feet, hardware, branding.
- Decide the silhouette family. Tote, crossbody, shoulder, satchel, hobo, bucket, sling or backpack; one, not three.
- Assign each image to one decision. An image that informs two decisions usually informs neither precisely.
- Mark the unresolved. Anything the board does not settle goes on a decisions-needed list with an owner and a date.
The output of phase one is short: three silhouettes maximum, a component list of roughly twenty lines, and a decisions-needed list. That is enough to start phase three in parallel, and it is small enough that the designer can still change their mind without cost. Every hour spent here is worth three in phase two.
Phase Two: Translating Proportion Into Measurements
This is the phase that determines how close the first prototype lands, and it is the one designers skip because measurements feel like the boring part. Proportion in a photograph is a relationship; a production pattern needs absolute numbers. The conversion is done best against a physical reference bag the designer already owns, measured with a steel rule, rather than against a mental image.
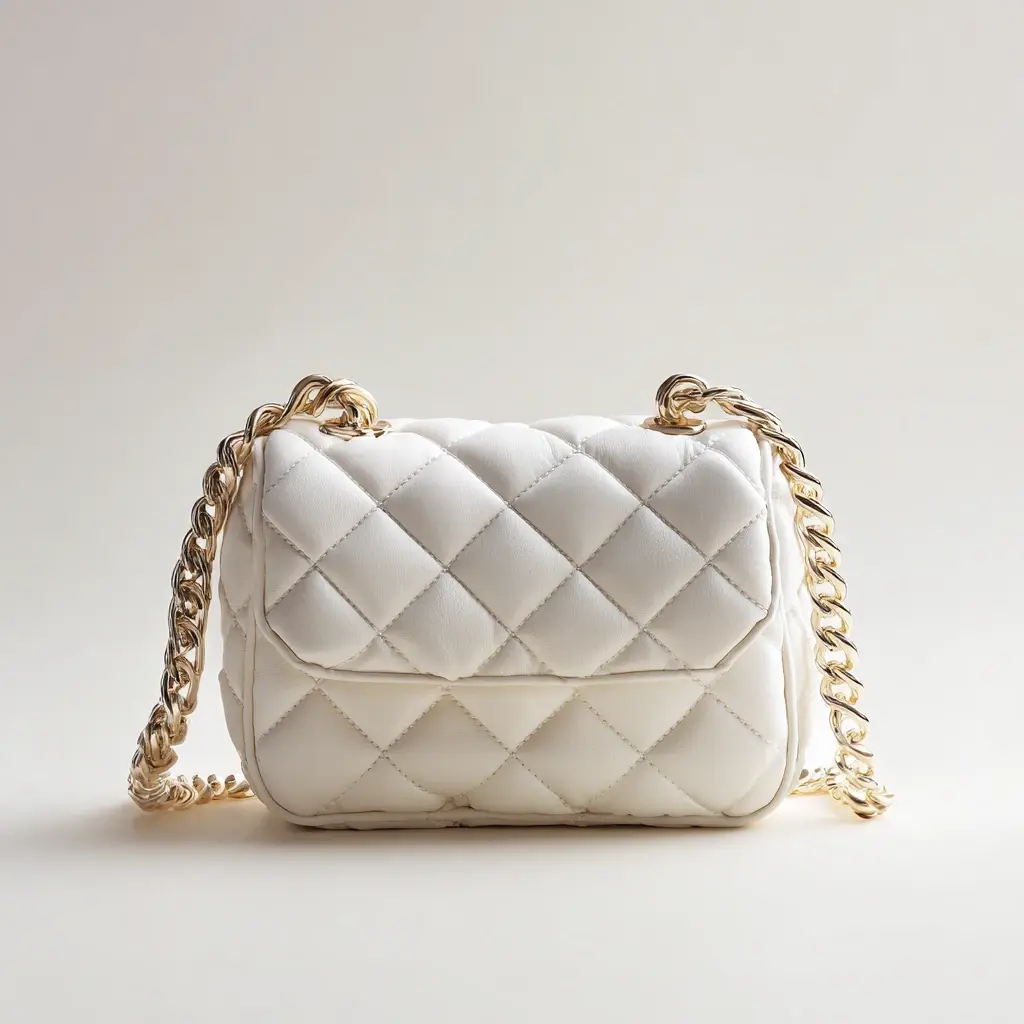
- Measure an object, not an image. A reference bag on the table gives numbers; a screenshot gives a ratio that has to be guessed into a scale.
- State every dimension with a tolerance. Body width plus or minus 3 mm, gusset plus or minus 2 mm, strap drop plus or minus 5 mm.
- Name a datum for each position. Branding, pockets and hardware positions measured from a stated edge, not from wherever looks right.
- Check the volume. A 34 cm by 27 cm tote with an 11 cm gusset carries about 10 litres; if the intended use needs more, the numbers are wrong.
Volume is the check most often missed and the one customers notice first. A bag that photographs beautifully and holds a phone, a bottle and a jacket badly will not convert twice. Writing the intended contents at the top of the file — laptop size in inches, bottle height in millimetres, whether a A4 document lies flat — turns an aesthetic brief into a functional one, and it makes the twelve measurements fall out almost automatically.
Phase Three: Specifying Materials and Hardware
Materials and hardware take two to three days because each is a separate purchase with its own reference, lot and lead time. The specification should name each by reference and thickness rather than by description: not a soft leather but full-grain bovine, 1.2 to 1.4 mm, semi-matte finish, with a tannery reference where Leather Working Group traceability applies.
| Component | Must specify | Typical value |
|---|---|---|
| Body material | Type, thickness, finish, colour code | Full grain 1.2-1.4 mm, Pantone TCX reference |
| Lining | Fibre, denier, colour code, fastness | 210D or 420D polyester, ISO 105-X12 grade 4 |
| Interlining | Type and thickness | 0.8 mm non-woven or 2 mm foam |
| Thread | Fibre, ticket number, colour code | Tex 40 bonded polyester, matched code |
| Hardware | Alloy, plating, thickness, salt spray | Zinc alloy, 0.3 micron minimum, ASTM B117 24 h |
| Closure | Type, size, tape colour, slider finish | Number 5 coil, tape matched, branded puller |
Colour deserves its own line per component rather than being implied by the body. One Pantone TCX code each for body, lining, thread, binding, zip tape and hardware tone, with a Delta E tolerance of 2.0 or better against an approved swatch. The full sequence from code to dyed fabric is set out in the Pantone to fabric dyeing walkthrough, and it is work that can start in parallel with everything else in this phase.
Phase Four: Construction Notes and Packaging
The last phase is where a tech pack stops being a drawing and becomes an instruction. Construction notes tell the bench how the bag is put together: stitch density, seam allowance, reinforcement, edge finish, and where a joint carries load. Packaging notes tell the line how it leaves: dust bag, hangtag, barcode symbology, carton marks and any marketplace preparation rule.
- Stitch density. 7-9 stitches per inch on body seams, counted over 25 mm; higher on load-bearing joints.
- Seam allowance. 10 mm with a tolerance of plus or minus 1 mm; less on turned and bound edges.
- Reinforcement. Named by position: strap attachment, base, handle, top edge of a tote.
- Edge finish. Edge paint in two or three passes, turned and stitched, or bound with a stated binding width.
- Branding. Method and position in millimetres from a datum edge: emboss, deboss, woven label, embroidery or metal plate.
- Packaging. Dust bag material and print, hangtag stock and string, barcode type, carton marks and packing ratio.
Packaging is routinely left until the goods are nearly finished, which is the wrong end of the calendar. A hangtag or barcode specification needs artwork and printing lead time, and a marketplace preparation rule discovered at packing stage means a re-pack rather than a print run. Write it in phase four even if the artwork is not final; the specification can be finalised later.
The Twelve Measurements Every Bag Tech Pack Needs
Ask any experienced pattern maker what is missing from a weak file and the answer is almost always the same list. These twelve appear on every silhouette with minor variation, and a file missing more than two of them will generate a round of questions before a single panel is cut.
- Body width at the widest point, in millimetres.
- Body height from base to crown, excluding the handle.
- Gusset depth at the base, and separately at the top where it tapers.
- Base width and length, for the base board and feet placement.
- Strap drop, measured from the crown to the apex of the strap.
- Strap width at the shoulder and at the attachment.
- Handle height where a top handle is present.
- Closure position, measured from a stated datum edge.
- Pocket positions and openings, interior and exterior.
- Branding position, in millimetres from two datum edges.
- Hardware positions, including feet, D-rings and sliders.
- Tolerances, stated once and applied to every line above.
Notice that six of the twelve are about the strap, the handle and the base — the parts that carry load. That is not a coincidence. The parts that carry load are the parts that fail in the field and the parts customers complain about, so they are the parts that need numbers rather than adjectives. A file that specifies the emboss position to the millimetre and the strap attachment not at all has its priorities backwards.
Where Designers Lose Days: Four Common Delays
Four delays account for most of the difference between a six-day file and a ten-day one. None of them is a drawing problem; all of them are decision problems, which is why they cannot be solved by working faster.
| Delay | Days lost | Fix |
|---|---|---|
| Silhouette not decided | 2-3 | Decide the family in phase one; one silhouette, not three |
| No physical reference to measure | 2 | Buy or borrow a reference bag and measure it with a steel rule |
| Material chosen by description | 2-3 | Name type, thickness and finish; order swatches in phase one |
| Branding left to the end | 1-2 | Fix method and position in phase four with millimetre datums |
The second delay is the most damaging because it compounds. Without a physical reference, every measurement is a guess, and a guessed measurement produces a prototype that is wrong in a way nobody can name precisely. Two days spent acquiring and measuring a reference bag removes a full sample round of 6-10 working days downstream. That is the best trade available anywhere in the workflow.
What the Finished File Looks Like
A complete file runs to roughly 120 entries across eight sections: cover with version and date, dimensioned drawing, measurement table with tolerances, material and hardware bill, colour references per component, construction notes, branding and packaging, and a compliance section listing the tests required by the destination market. It is not a long document; it is a dense one.
- Cover. Style name, season, version number, date, and the name of the person who owns the file.
- Drawing. Front, back, side and interior views, annotated, with the nine-frame reference photographs attached.
- Measurements. The twelve, plus tolerances, plus intended contents and volume.
- Bill of materials. Every component by reference, not by description, with the supplier reference where known.
- Compliance. REACH Annex XVII, Proposition 65 for California, CPSIA where relevant, and the requested test report list.
Two closing checks take five minutes and save a round. Read the file as if it were being handed to someone who has never seen the mood board, and mark every line that depends on an unstated assumption. Then check that every number in the drawing matches the number in the table, because a discrepancy between the two is the single most common cause of a first prototype that is confidently wrong. The checklist for a tech pack a partner accepts first time covers the remaining gaps, and what a tech pack should actually include gives the field-by-field reference.
Units, Rounding and the Tolerance Stack
International files go wrong on units more often than on design: mixed units, conversions rounded halfway through a calculation, and tolerances forgotten once twelve dimensions meet in one assembly. Three rules remove most of it, and they cost nothing to adopt on the first file rather than learning them on the fourth. The measurement specification that prevents returns carries the same discipline into the size chart a customer reads.
- Metric only, and convert once. One inch is 25.4 millimetres exactly; convert at the end of a calculation and round once to the nearest millimetre, never at each intermediate step.
- Nominal plus tolerance, never a range. Write 300 plus or minus 3 millimetres rather than 297-303, so the target is unambiguous on the bench.
- Tolerance stack. Twelve independent tolerances of plus or minus 3 millimetres combine realistically to about 10 millimetres by root-sum-square, which is why load-bearing dimensions such as strap drop take plus or minus 1 to 1.5 millimetres.
- State the condition of measurement. A 250 millimetre strap drop measured empty reads 265-275 millimetres under a one kilogram load, so specify which one is being quoted.
Build a Reference Library Before the First Line
The fastest change a designer can make is to stop drawing from photographs and start measuring objects. A shelf of six torn-down bags is the source of the next ten tech packs, and it removes the two-day delay that phase two most often runs into. The sketch to sample walkthrough assumes this library already exists.
- Buy or borrow three to five bags close to the intended brief, including one that failed commercially, for USD 150-450 in total; outlet rails and returns racks are good hunting.
- Tear each one down and record the twelve core measurements in millimetres, plus hardware gauges, seam allowance and how the lining was inserted.
- Record what is wrong with each bag beside what is right: a strap that twists, a base that slumps, a magnet too weak for the flap weight.
- File each bag with a card carrying its own numbers, so the reference survives the person who measured it.
- Reuse it every time phase two starts; the two days it saves on a single file pays for the library on the second style.
Version Control That Ends the Email Thread
Files die in the revision stage. A colour name agreed in a message but never written into the document produces a bulk run built to a specification that exists nowhere except an inbox. One revision table with six fields makes every change traceable months later by somebody who was not in the conversation.
| Field | Example | Rule |
|---|---|---|
| Style code | TOTE-2201 | Issued once, never reused for another silhouette |
| Revision letter | rev C | Every issued change increments; a letter is never used twice |
| Date and owner | 2026-03-14, one named person | One owner signs the file, not a department |
| Changed fields | Binding colour replaced; strap drop 250 to 260 | List exactly what moved |
| Reason | Sample failed a 5 kg strap pull | Makes the change auditable six months later |
| Superseded file | rev B archived, not deleted | Answers what was actually made in February |
The Pre-Flight Check Before the File Leaves
Ten minutes of reading against a fixed list replaces the first exchange of questions, and the list below is complete enough to work as a gate. Score it honestly: two or more failures and sending the file costs more than finishing it, because the first reply will be a request rather than a quotation.
- Every dimension carries a tolerance, and the six load-bearing ones carry the tightest.
- Every material carries thickness, finish and a reference: not soft leather but full grain bovine 1.2-1.4 millimetres, semi-matte, with a Pantone TCX code.
- Every hardware item carries size, plating thickness in microns and a salt spray figure, rather than gold or gunmetal alone.
- Construction notes are quantified: 7-9 stitches per inch, a 10 millimetre seam allowance, and reinforcement named at each stress point.
- Branding and packaging are specified with millimetre datums, including the barcode or identifier the channel needs, and the file name ends with the style code and revision letter.
Send a mood board, get a cuttable file back
Send the mood board, a reference bag you own and the intended contents. A handbag programme specialist will return a dimensioned tech pack with twelve measurements and a bill of materials, and sampling runs 6-10 working days from there. Get a quote.
Frequently Asked Questions
How long does it take to turn a mood board into a bag tech pack?
Six to ten working days across four phases: one to two days for the concept inventory, two to three for measurement translation, two to three for materials and hardware, and one to two for construction and packaging notes. Running material sourcing in parallel with measurement work is how a confident designer reaches six rather than ten.
How many measurements does a handbag tech pack need?
Twelve core measurements: body width, body height, gusset depth at base and top, base width and length, strap drop, strap width, handle height, closure position, pocket positions, branding position, hardware positions, and a stated tolerance applied to all of them.
Why should a designer measure a physical reference bag instead of a photograph?
Because a photograph shows proportion, which is a relationship, while a pattern needs absolute numbers. Measuring a reference bag on the table with a steel rule produces millimetres directly; guessing a scale from a screenshot produces a prototype that is wrong in a way nobody can name precisely, which costs a full sample round.
What tolerance should be used for handbag measurements?
Body width and height at plus or minus 3 mm, gusset depth at plus or minus 2 mm, strap drop at plus or minus 5 mm and seam allowance at plus or minus 1 mm. Each should be paired with a measurement method, such as an empty bag on a flat table or a hung bag for strap drop.
How many silhouettes should be developed from one mood board?
Three at most. Three reads as a line without multiplying pattern setups: 1,500 pieces at 500 per style, three SKUs and one material buy. A mood board that supports eight silhouettes has not been edited, and the editing is the actual design work.
What should a material line specify?
Type, thickness, finish and colour code. Not a soft leather but full-grain bovine at 1.2 to 1.4 mm with a semi-matte finish and a Pantone TCX reference, plus a tannery reference where Leather Working Group traceability applies. The same discipline applies to lining, interlining, thread and hardware.
Which measurements matter most on a bag?
The ones that carry load: strap drop and width, handle height, and base width and length. Six of the twelve core measurements concern those parts because they fail in the field first and generate the complaints. A file that specifies an emboss position precisely and the strap attachment vaguely has its priorities backwards.
What are the four delays that cost designers the most days?
Not deciding the silhouette family, having no physical reference to measure, choosing materials by description rather than by specification, and leaving branding to the end. Together they account for most of the gap between a six-day file and a ten-day one.
How many entries are in a complete tech pack?
Roughly 120 across eight sections: cover with version and date, dimensioned drawing, measurement table with tolerances, material and hardware bill, colour references per component, construction notes, branding and packaging, and a compliance section for the destination market.
Should packaging be specified in the tech pack?
Yes, in phase four, even if the artwork is not final. Hangtag and barcode specifications need artwork and printing lead time, and a marketplace preparation rule discovered at packing stage means a re-pack rather than a print run. Write the specification early and finalise the artwork later.
What compliance section should the file carry?
A list of the tests required by the destination market: REACH Annex XVII for the European Union covering azo dyes, chromium VI and nickel release, Proposition 65 for California, CPSIA where a bag is marketed to children, and any retailer-specific requirement such as a BSCI or Sedex audit reference.
What is the final check before sending a tech pack out?
Two of them. Read the file as though handing it to someone who has never seen the mood board and mark every line that depends on an unstated assumption. Then confirm that every number in the drawing matches the number in the measurement table, because a discrepancy between the two is the most common cause of a confidently wrong prototype.
People Also Ask
Can phases two and three run in parallel?
Yes. Material sourcing and colour work do not depend on the measurements, so start them on day two. Phase two cannot be parallelised, because measurements must be resolved before any pattern is drawn.
Is a hand-drawn sketch enough to start?
It is enough to start phase one, but not to cut a pattern. A sketch plus a measured reference bag and a written measurement table is the minimum that produces a close first prototype.
Why does intended contents matter in a design file?
Because it converts an aesthetic brief into a functional one. Stating the laptop size, bottle height and whether an A4 document lies flat makes the twelve measurements fall out almost automatically, and it prevents a bag that photographs well and carries badly.
Should colour be specified per component?
Yes. One Pantone TCX code each for body, lining, thread, binding, zip tape and hardware tone, with a Delta E tolerance of 2.0 or better. A colour specified only for the body leaves the lining to be chosen by someone else.
What makes a tech pack feel complete to a pattern maker?
Numbers instead of adjectives, a datum for every position, tolerances stated once, and a drawing whose dimensions match the table. Those four things matter more than how polished the illustration looks.
Sources and further reading
Every figure on this page is either our own programme data or attributed below. Open the originals before you write them into a specification.
- Leather Working Group — environmental auditing for tanneriesLeather Working Group Environmental audit protocol for tanneries and leather traceability.
- SATRA — technical services for leather, footwear and accessoriesSATRA Independent leather, hardware and accessories testing protocols.
- REACH — chemical substances regulationEuropean Commission Annex XVII restricts the substances that may appear in finished leather and coatings.